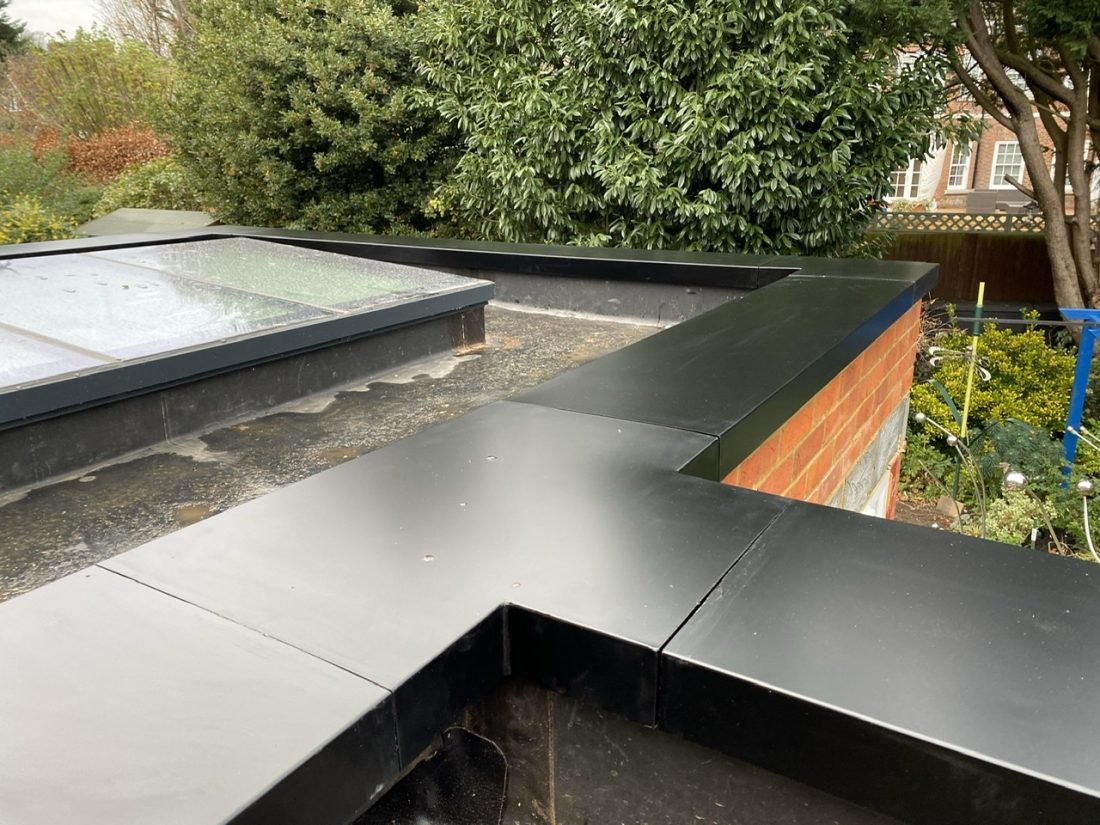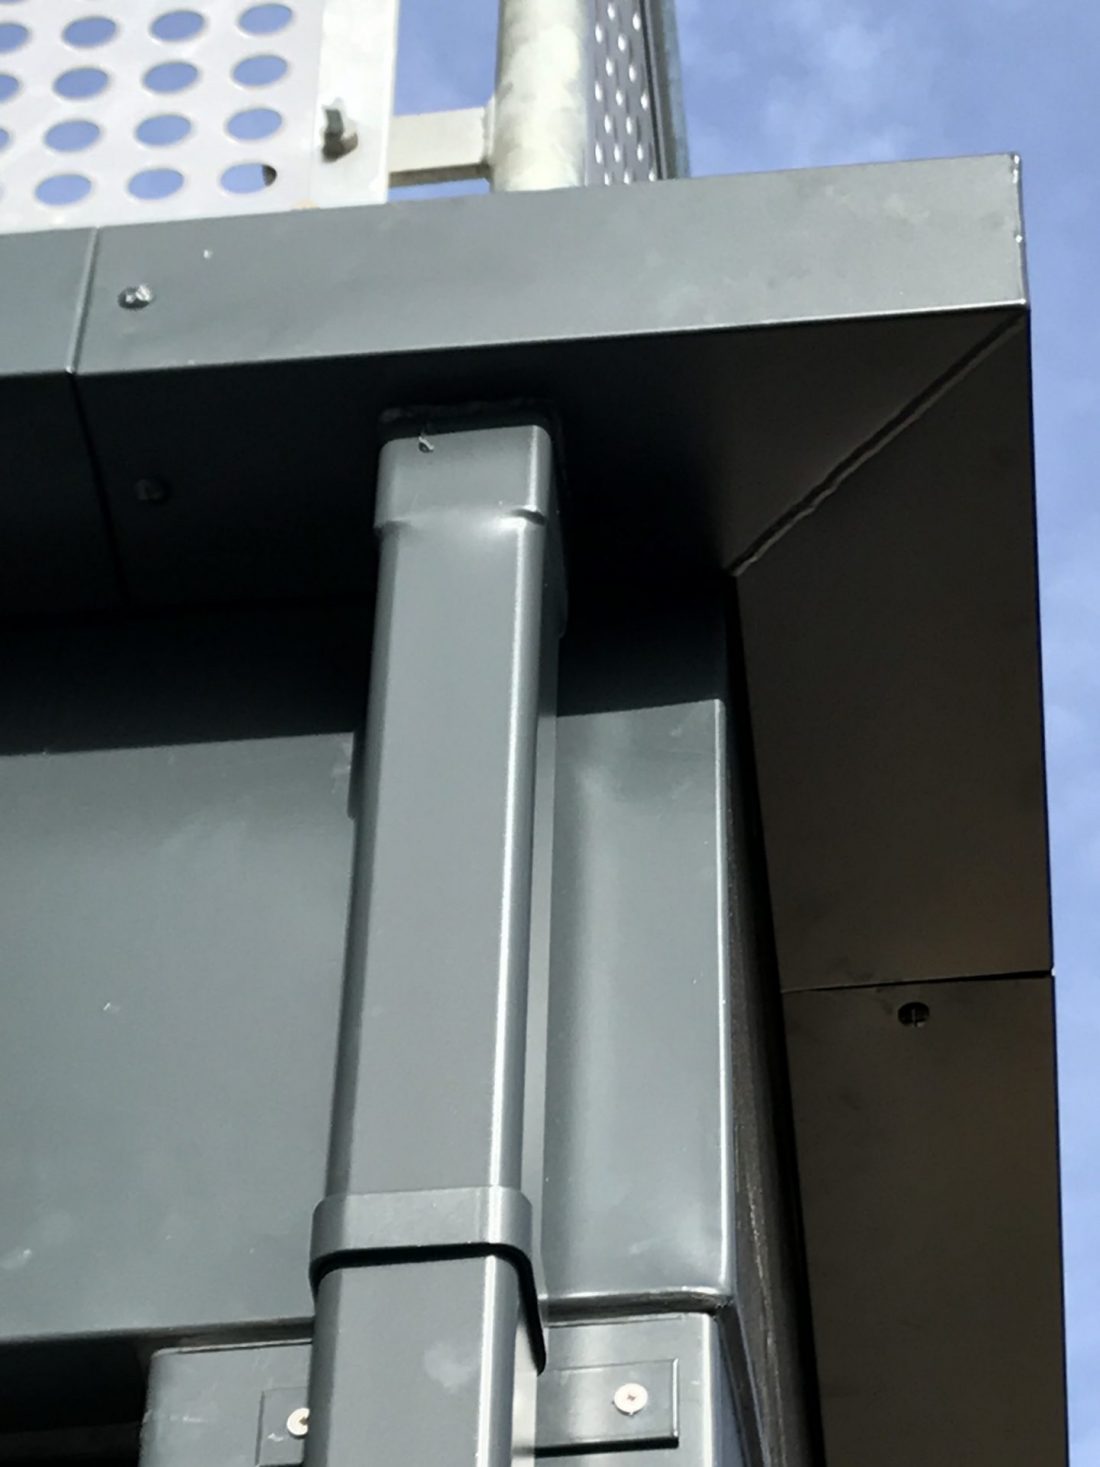

Seamless Versus Sectional Gutters Compared

A gutter joint is a small detail until it sits above a doorway, conservatory or freshly finished render. When weighing up seamless versus sectional gutters, the real decision is not simply about the number of joints. It is about the building’s appearance, roof area, access, drainage capacity, budget and whether the system needs to suit a heritage façade or a clean contemporary elevation.

Aluminium offers a durable, low-weight and corrosion-resistant base for either approach. The right format depends on how the gutter is made, delivered and installed on site.

Seamless Versus Sectional Gutters: The Main Difference

A seamless gutter is formed as a continuous length to suit the individual roofline. On a typical domestic installation, the gutter is produced to the required run length on site or supplied as a purpose-made continuous section, with joints generally limited to corners, outlets and stop ends. This creates a particularly neat line across long, straight elevations.

A sectional gutter is made from standard lengths joined with unions, connectors or bolted joints. Cast aluminium, extruded aluminium and pressed aluminium systems are commonly supplied this way. Individual components allow the installer to build the run around corners, offsets, changes in level and awkward details.

Neither system is automatically better. A long, uninterrupted modern frontage may favour a continuous run. A Victorian property with bay windows, ornate eaves and several changes in direction will often benefit from a sectional cast system that can follow its character accurately.

Joints, Leaks and Long-Term Maintenance

The strongest practical argument for a continuous-run system is the reduction in joints along a straight gutter length. Fewer connectors mean fewer locations that must be sealed, aligned and maintained. This can reduce the opportunity for leaks caused by movement, failed seals or debris building up around a joint.

That does not mean sectional aluminium guttering is unreliable. A correctly specified and professionally fitted system is designed to manage expansion and discharge water effectively. The important point is that every union must be installed square, properly sealed where required and supported at the correct spacing. Poor falls, undersized outlets and blocked downpipes cause far more gutter problems than the mere presence of joints.

For facilities teams and property owners, maintenance should remain part of the specification. Leaves, moss and roof debris can obstruct any gutter, whether it is made in one long run or assembled from sections. Regular clearing is especially worthwhile where the building sits below mature trees or where valleys discharge a large volume of water into one point.

Appearance and Architectural Suitability

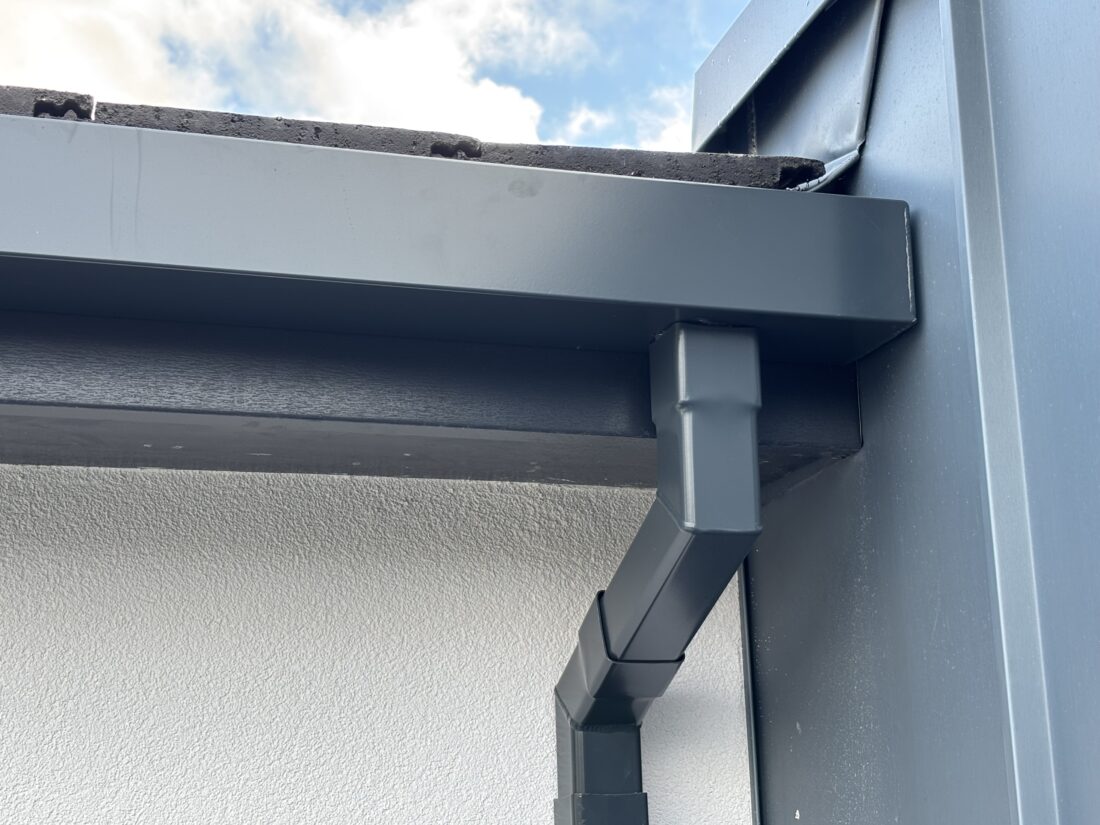
Continuous ogee guttering gives a crisp, uncluttered finish that suits modern homes, extensions and contemporary commercial elevations. It works well where the design calls for a long horizontal line with minimal visual interruption. A powder-coated finish can be selected to coordinate with windows, fascias, cladding or roofline details.

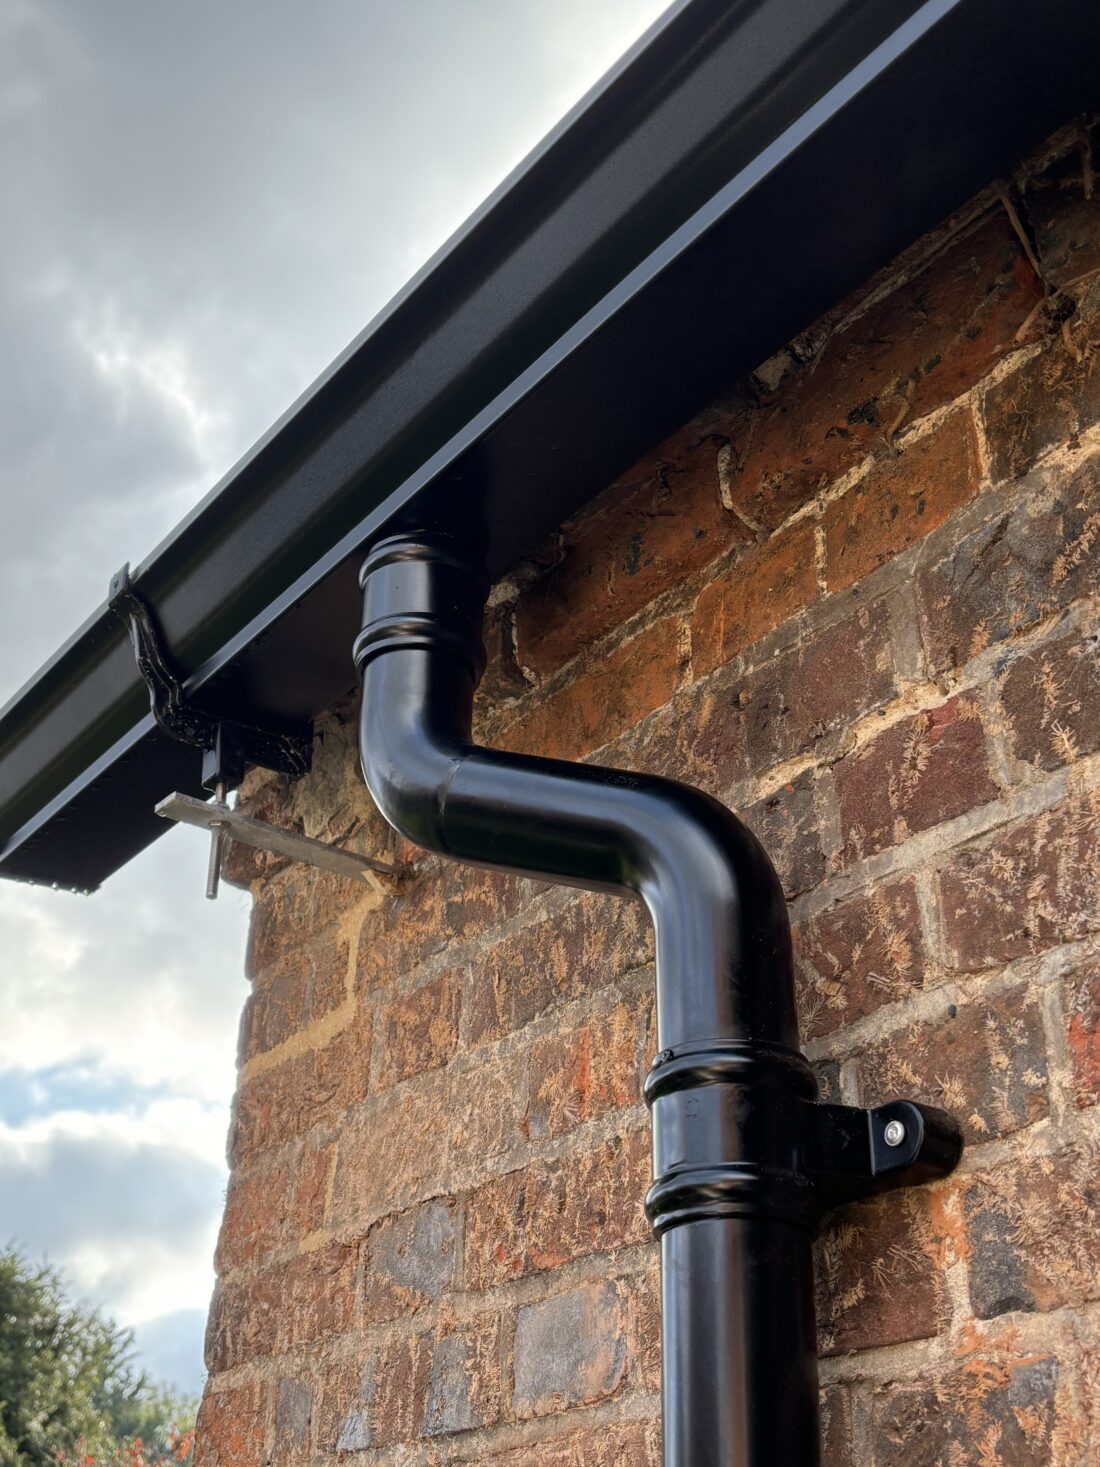
Sectional systems offer more design choice. Cast aluminium gutters are particularly appropriate for period houses, listed buildings and restoration work because their profiles can reproduce the depth and detail associated with traditional rainwater goods. Ornamental hopper heads, round or rectangular downpipes and heritage-style brackets can complete the elevation rather than looking like an afterthought.

Extruded aluminium is often a practical middle ground. It provides a sharp, consistent profile and can be supplied in standard lengths, while retaining the flexibility to deal with complex roof geometry. Pressed aluminium box gutters are also well suited to larger roof areas and commercial projects where capacity and detail at parapets or concealed roof edges matter more than a domestic-style ogee profile.

Installation: Access Often Decides the Issue

Installation conditions can make the choice clearer. Continuous gutter runs require suitable access and careful handling. A long length must be produced, lifted and fixed without twisting or damaging the finish. Restricted side access, narrow passageways, overhead cables, fragile landscaping or a heavily stepped elevation may make this less straightforward.

Sectional components are easier to carry through constrained sites and up scaffolding. They can be cut, adjusted and assembled in manageable lengths, which is useful on renovations where existing rooflines are not perfectly straight. This flexibility also helps where a gutter must work around dormers, bays, conservatories or multiple return corners.

For new-build work with clear access and long straight eaves, continuous runs can be installed efficiently and give an exceptionally tidy result. On refurbishment projects, a site measure is valuable before deciding. It confirms run lengths, bracket fixing positions, outlet locations, fascia condition and the practical route for downpipes.

Capacity, Falls and Downpipe Design

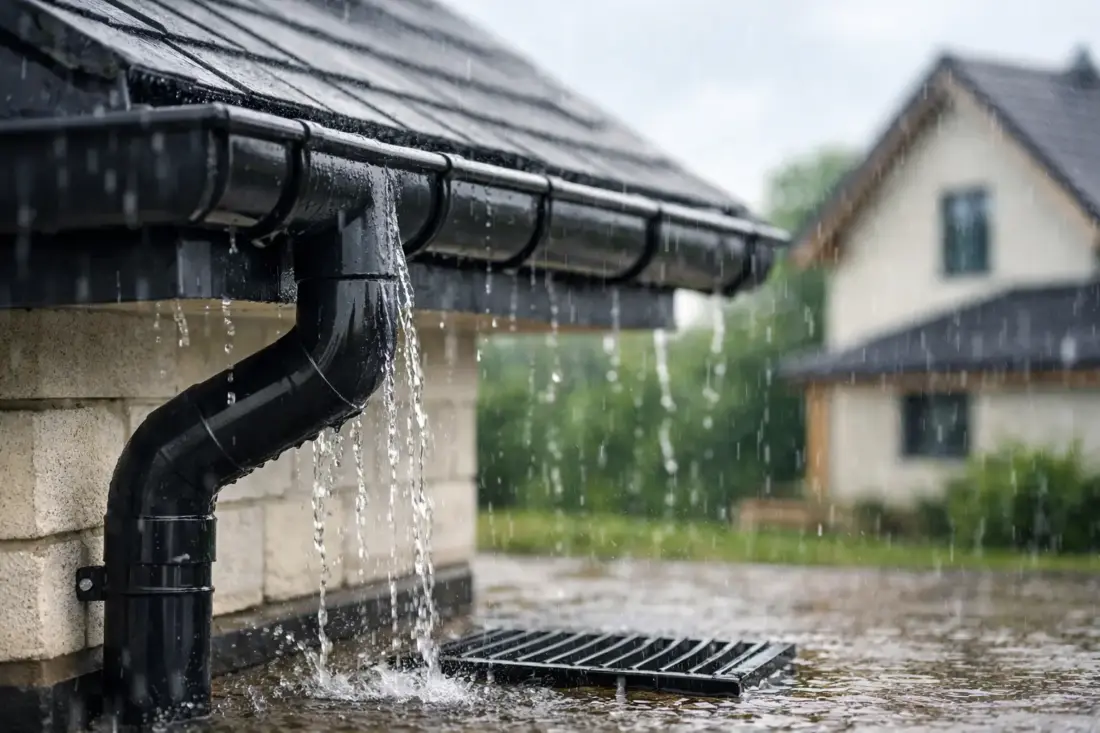
A gutter should never be selected on looks alone. The roof catchment area, roof pitch, valley positions and local exposure all affect the volume of water reaching the system during heavy rainfall. A narrow gutter with too few outlets can overflow even if it has no joints at all.

For ordinary domestic applications, an ogee or half-round profile may be suitable when paired with correctly sized downpipes and adequate falls. Larger homes, buildings with broad roof planes and commercial premises may need high-capacity aluminium gutters, such as box profiles, with larger outlets and downpipes. A 200mm x 150mm box gutter, for example, addresses a very different drainage requirement from a standard domestic profile.

Outlet positioning deserves close attention. Water should travel a sensible distance to an outlet, and gutter falls should direct it there without creating low points. On long runs, installers may form a fall towards one outlet, split the fall to outlets at each end, or arrange it around the roof layout. The best arrangement is based on the actual roof, not a standard rule applied to every job.

Cost: Initial Price Versus Whole-Life Value

Sectional guttering can offer a lower or more predictable material cost on smaller projects because standard lengths and fittings are readily specified. It is also practical for supply-only orders where a competent roofer, builder or property owner is fitting the system. Individual parts can be ordered to suit measured runs, corners, outlets and downpipe positions.

Continuous-run gutters may cost more to arrange because the work relies on specialist forming equipment, site access and an installation process tailored to the property. However, the cleaner appearance and reduced number of straight-run joints can justify the cost on prominent elevations or larger new-build projects.

The comparison should include more than the price per metre. Consider scaffold requirements, labour, finish, expected service life, the number of outlets required and the likely cost of future alterations. Aluminium is well suited to long-term ownership because it does not rust in the way steel can, and quality powder coating provides a durable coloured finish.

Repairs, Extensions and Future Changes

Sectional systems have a clear advantage when an isolated length needs replacing or a future extension changes the roofline. An installer can usually remove and renew a defined section, then add compatible fittings as needed. This is useful for phased renovation work and for buildings likely to receive rear extensions or new porch roofs.

A continuous run can still be repaired, but the solution may involve cutting out a damaged area and fitting a purpose-made repair section or connector. The repair should be planned carefully so water flow, finish and expansion are not compromised. If future flexibility is a priority, a sectional arrangement may be the more sensible choice.

Colour matching also matters in either case. Ordering the gutter, downpipes, hopper heads and associated roofline components together helps achieve a coordinated result. Bespoke powder coating can be valuable where standard black, white or anthracite does not suit the building.

Choosing the Right Aluminium System

Choose a continuous-run system when the roofline is long and straight, visual simplicity is a priority and site access supports installation. It is particularly effective for contemporary homes and clean-lined commercial façades.

Choose sectional guttering when the building has detailed architecture, difficult access, multiple corners or a requirement for traditional cast profiles. It is also the practical option where phased work, future changes or component-by-component replacement are likely.

For high-capacity applications, begin with the drainage calculation and roof detail rather than the profile style. A commercial box gutter, suitable outlets and correctly sized downpipes will do more for stormwater control than choosing between two assembly methods alone.

Gutters Direct can supply aluminium systems for both traditional and modern projects, with technical guidance on profiles, dimensions, finishes and fitting options. Bring measured gutter runs, roof plans or clear elevation photographs to the discussion. The most reliable rainwater system is one that suits the roof it has to drain, the façade it has to complement and the site team that has to install it.

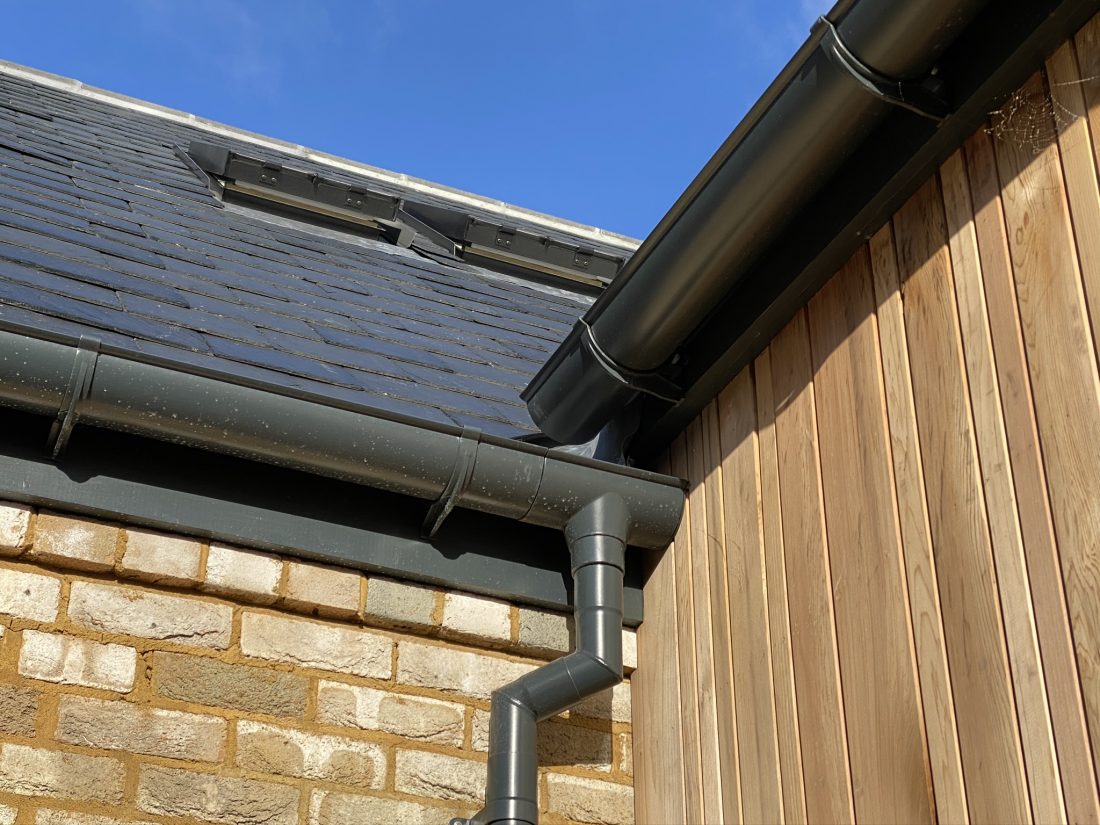
Seamless Gutter Installation Guide for UK Roofs

A continuous aluminium gutter run can give a roofline a clean finish while reducing the number of joints where leaks may develop. That does not make it a fit-and-forget product. A proper seamless gutter installation guide starts with the roof area, discharge points and fascia condition, then works through the practical details that determine whether water reaches the downpipe in heavy rain.

For homeowners, builders and specifiers, the main benefit is straightforward: gutters are formed to the required length on site, rather than assembled from multiple short sections. This suits contemporary elevations particularly well, but it can also be specified on renovation work where a durable, colour-matched aluminium system is required.

Start with the roof survey

The gutter should be selected from the roof’s drainage demand, not simply from the appearance of the existing system. Measure each roof plane feeding a gutter run, identify valleys and dormers, and note where water concentrates. A small rear elevation with one downpipe has very different requirements from a long roof slope discharging into a central valley.

Check the fascia, rafter ends or eaves structure before ordering brackets. Aluminium gutters are light, but brackets still need a firm, sound fixing line. Rotten timber, loose fascia boards and uneven eaves should be repaired or allowed for before fitting begins. Fixing a new system to an unsound background only transfers the problem to the new gutter.

Outlet locations need equal care. Water should take the shortest sensible route to a downpipe, but the downpipe must also connect cleanly to a gully, drain or suitable rainwater disposal point. Moving an outlet can improve the visual balance of an elevation, yet it may create additional underground drainage work. The right position depends on both appearance and capacity.

Choosing Guttersdirectonline

Continuous aluminium systems are commonly formed in ogee-style profiles for domestic work, although boxier and higher-capacity profiles may be more suitable for commercial elevations, wide roof areas or buildings with large valleys. The gutter profile, outlet size and downpipe diameter must work as one drainage system.

A profile that looks adequate from ground level can still be undersized where a large roof area drains into a single point. Equally, installing an oversized industrial gutter on a modest period property can look out of place. For heritage work, cast aluminium profiles and traditional hopper heads may provide a more appropriate architectural result, while modern homes often suit clean-lined ogee or box guttering.

Finish is also part of the specification. Powder-coated aluminium can be supplied in a wide choice of colours, allowing the gutter, downpipes, fascias and window details to be coordinated. Dark colours can make a roofline recede; lighter finishes can define it. On exposed sites, choose a finish suited to the location and ensure cut ends or site-modified components are properly protected.

Set out falls before fitting brackets

Gutters need a controlled fall towards the outlet so water does not sit in the run after rainfall. The required gradient depends on the profile, length, drainage layout and manufacturer guidance, but the principle is constant: establish the outlet level first, set the high point at the opposite end, and run a string line between them.

Do not rely on the fascia being level. Many older properties have settlement, sagging boards or slight changes in the eaves line. A gutter that follows every imperfection may look acceptable from below but hold standing water. On a listed or character property, there may be a judgement call between maintaining a visually sympathetic line and achieving drainage fall. This is where a site survey and experienced fitting support are worthwhile.

Bracket spacing must follow the system specification. Spacing that is too wide allows the gutter to deflect under rainfall, debris or snow load. Brackets should be positioned close to outlets, stop ends, corners and joints where the system needs extra support. Use suitable corrosion-resistant fixings for the substrate and avoid overtightening, which can distort brackets or damage timber fascias.

Forming and installing continuous aluminium runs

A seamless gutter is normally roll-formed to length on site using specialist equipment. The installer measures the run after the survey, forms the aluminium coil to the required profile, and lifts the finished length into position for fixing. Long sections need careful handling. Aluminium is lightweight, but a formed gutter can twist or mark if it is dragged across scaffolding, forced around corners or lifted without enough support.

Continuous runs reduce intermediate joints, but they do not remove the need for end caps, outlets, corners and connections. These components must be fitted squarely and sealed using the specified method. Inadequate preparation is a common source of leaks: surfaces should be clean, dry and free from swarf before seals, sealant or mechanical connections are made.

Allowances for thermal movement matter with aluminium. A long run expands and contracts as temperatures change, particularly on south-facing elevations in darker colours. The system’s outlets, joints and brackets should be installed in accordance with the profile manufacturer’s movement requirements. Locking every point rigidly can cause distortion; leaving components unsupported can lead to sagging. The detail is not optional.

Cut outlets accurately and fit downpipes securely

Outlets should be cut only after their position is confirmed from the drainage plan and the gutter is supported. A poorly placed or oversized opening weakens the gutter and can allow water to overshoot during a downpour. Remove sharp edges and swarf, then fit the outlet with the correct seal and fixing arrangement.

Downpipes need a direct, tidy route with sufficient clips to hold them securely against the wall. On busy commercial sites, schools or public-facing buildings, anti-vandal downpipe arrangements may be appropriate at low level. On domestic work, offset bends can often take a downpipe neatly from the eaves to the wall, but excessive bends reduce flow and make clearing more difficult.

Make sure the base of the downpipe discharges correctly. Connecting new guttering to a blocked or undersized gully will not solve an overflow problem. Where existing drainage is unknown, inspect it before the installation is signed off.

Test the system before removing access

Water testing is the practical check that turns a neat installation into a reliable one. Run water into the high end of each gutter length and watch the flow towards the outlet. Check for standing water, drips at end caps or outlets, backfall near corners, overshooting at the downpipe and movement in brackets.

Testing should also include the downpipe and its connection at ground level. If water backs up, investigate before scaffolding or access equipment is removed. Minor adjustments are far easier at this stage than after the property has been handed back.

A visual inspection from ground level is useful too. Look along the gutter line for dips, twists and uneven bracket positions. On a modern property, the continuous line is a key part of the finished appearance. On traditional buildings, neat alignment helps the new rainwater system sit comfortably alongside original features.

When professional installation is the sensible option

Supply-only can work well for competent roofing and building contractors who have the correct access equipment, measuring process and experience with aluminium rainwater goods. Standard cut-and-drop components are also practical for shorter runs and repairs. However, on-site formed guttering requires specialist machinery and careful handling, so it is generally best installed by a trained fitting team.

Professional installation is particularly useful for long elevations, multi-storey work, complex valleys, concealed drainage details and sites where colour-matched aluminium gutters, downpipes and roofline products must align precisely. Gutters Direct can provide aluminium systems on a supply-only basis or support projects with cut-and-drop and installation services, depending on the site requirement.

Before work begins, settle the profile, colour, outlet locations, bracket fixing background and access plan. That preparation gives the installer a clear route to a gutter line that drains properly, looks right on the building and remains straightforward to maintain for years to come.

Aluminium Guttering

How Long Aluminium Gutters Last in the UK

A gutter system can look perfectly sound from ground level while quietly allowing water to spill behind the fascia, soak masonry or overload at every downpour. For anyone replacing rainwater goods, the practical question is how long aluminium gutters last – and whether the system will suit the building, rainfall levels and maintenance plan.

A correctly specified and professionally fitted aluminium gutter system should commonly provide 30 years or more of service. Many installations continue to perform well for 40 years and beyond. Cast aluminium systems on well-maintained homes can last substantially longer, particularly where the original profile, joints and coatings have been properly cared for.

That lifespan is not a blanket guarantee. Gutter profile, metal thickness, coating quality, exposure and installation details all have a direct bearing on how long the system remains watertight and presentable.

Why buy from Guttersdirectonline:

Aluminium does not rust in the way steel does. Its surface naturally forms a thin oxide layer that helps protect the metal beneath from further corrosion. This makes it a strong long-term choice for UK rainwater systems, where gutters are exposed to regular wetting, frost, leaf debris and changing temperatures.

For a domestic property, 30 to 40 years is a sensible expectation for good-quality extruded or pressed aluminium guttering fitted to the right falls and supported correctly. A cast aluminium gutter, often selected for period properties because of its traditional depth and detail, may serve for 40 to 50 years or longer. The heavier sections and durable material make these systems especially suited to heritage refurbishment when the building needs a profile with architectural character as well as reliable drainage.

Commercial and high-capacity systems can achieve a similarly long working life, but their outcome relies more heavily on hydraulic design. A 200mm x 150mm box gutter carrying roof water from a large elevation has very different demands from an ogee gutter on a detached house. If the gutter is undersized or downpipes are too few, standing water and regular overflow can shorten the useful life of even a high-quality aluminium installation.

Why aluminium lasts well on UK buildings

The main benefit is corrosion resistance combined with low weight. Aluminium is far easier to handle than cast iron during installation, yet it delivers a substantial, rigid rainwater system when the profile and bracket centres are correctly selected. It will not develop the widespread red rust associated with neglected steel gutters, and it does not become brittle in the manner some older plastic systems can over time.

Powder coating adds another protective and visual layer. A factory-applied or professionally specified polyester powder-coated finish helps maintain colour consistency across gutters, downpipes, hoppers and associated roofline details. It also gives architects and homeowners far more freedom than standard white plastic, whether the requirement is heritage black, anthracite grey, a muted heritage tone or a colour matched to windows and cladding.

There is a useful distinction between the coating and the aluminium itself. A scratched or weathered coating may need local attention to preserve appearance, but it does not mean the underlying gutter has failed. Where bare aluminium is exposed, its natural oxide layer still offers protection. Promptly repairing deeper damage is nevertheless good practice, particularly in exposed locations.

The factors that can shorten gutter life

Water should move through a gutter and into the downpipe, not sit in one place. Poor falls are one of the most common avoidable causes of premature problems. A run installed level, or with a reverse fall, can retain water and debris around joints. Over time, this places unnecessary stress on seals, coatings and fixings.

Jointed gutters require particular care. Cast and extruded systems are normally assembled from manageable lengths using unions, stop ends, outlets and bolts or fixings appropriate to the profile. These connections need clean mating surfaces, correct seals and enough allowance for thermal movement. Aluminium expands and contracts as temperatures change, so forcing long runs tightly between fixed points can lead to distortion or leaks at joints.

Seamless aluminium ogee systems reduce the number of joints along a run because they are formed to the required length on site. This can be a major advantage on long, clean-lined elevations. It does not remove the need for accurate outlets, stop ends, bracket spacing and falls, but fewer joints mean fewer potential leak points.

The local environment matters too. Coastal properties face salt-laden air, while industrial areas can expose coatings and fixings to more aggressive contamination. These sites benefit from a carefully chosen powder-coating specification and regular washing. Aluminium remains a very capable option in these conditions, but the system should be specified for the exposure rather than treated as a standard installation.

Physical damage is another consideration. Ladders, overfilled roof valleys, falling branches and poorly positioned access equipment can dent gutters or damage a coating. At ground level, downpipes on public-facing buildings may need anti-vandal protection or a more durable arrangement to prevent repeated impact damage.

Specification matters more than material alone

Choosing aluminium is only the first decision. The gutter must have enough capacity for the roof area, pitch, local rainfall intensity and number of outlets. A shallow domestic profile may be entirely appropriate for one elevation but inadequate for a large roof discharging into a single corner outlet.

Downpipe capacity is just as important. Water cannot leave the gutter fast enough if the outlet is restricted, the downpipe is undersized or the route has unnecessary bends. Overflowing water often gets blamed on the gutter material, when the real issue is layout. For extensions, flat roofs, commercial units and buildings with long valleys, it is worth checking the rainfall calculation before ordering components.

Bracket centres should suit the selected system and site conditions. Wide spacing can allow a gutter to sag under snow, water or leaf loading, compromising the fall. Fascia condition also matters. There is little value in installing a long-life gutter onto decayed timber that cannot hold its fixings securely.

For listed buildings and traditional renovations, profile selection deserves equal attention. A cast aluminium half-round, moulded ogee or heritage hopper can retain the visual proportions of the original rainwater goods without accepting the weight and corrosion burden of old cast iron. Modern buildings may instead benefit from extruded lines, seamless ogee runs or pressed aluminium box gutters with sharp, consistent detailing.

Maintenance that protects a 30-year-plus system

Aluminium gutters are low maintenance, not no maintenance. An inspection each autumn and spring is usually enough for most houses, with extra checks after severe storms or nearby building work. Clear leaves, moss and silt before they form a dam at an outlet. Look for standing water after rainfall, loose brackets, damaged seals, blocked gullies and signs of water tracking on the wall below.

Wash the outer face occasionally with clean water and a mild detergent where traffic film, salt or algae can build up. Avoid harsh abrasive cleaning that could mark the powder-coated surface. If a coating is chipped, assess whether it is cosmetic or whether a touch-up treatment is needed. Addressing small defects early is simpler than waiting for moisture to work around a joint or fixing.

Properties beneath mature trees need more frequent attention. Fitting a leaf guard may help in some situations, but it is not a substitute for checking outlets. Fine debris can still accumulate, and guards must be compatible with the chosen gutter profile and roof arrangement.

When replacement is actually needed

A local leak does not automatically mean a complete replacement. Failed seals, an incorrectly fitted union, a damaged stop end or a blocked outlet can often be repaired without removing the full run. Likewise, a faded finish may be an appearance issue rather than a structural one.

Replacement becomes more sensible where several joints are failing, falls have been compromised, the gutter has suffered repeated impact damage or the capacity is demonstrably inadequate for the roof. It is also a good time to review downpipe positions, fascia condition and whether a seamless or higher-capacity profile would better suit the property.

The longest-lasting aluminium gutter is the one sized for the roof, finished for its environment and fitted with care from the outset. If the right profile is not obvious, Gutters Direct can help identify a practical system that respects both the building detail and the volume of water it needs to manage.

Period Property Rainwater Restoration Guide

A failed gutter on a period house rarely stays a gutter problem. Water spills onto brickwork, saturates timber eaves, marks render and can overwhelm drains at the base of the wall. This period property rainwater restoration guide sets out how to assess the existing system, retain the building’s character and specify aluminium components that will manage rainfall reliably for years to come.

Start with the building, not the replacement gutter

Period properties were built around a wide range of roof pitches, eaves details and drainage arrangements. A Victorian terrace may have a deep moulded gutter and decorative hopper heads, while an Edwardian house may use larger downpipes and long gutter runs feeding a shared outlet. Replacing a damaged section with the nearest available modern profile can alter the elevation and leave the system under-sized.

Start with a ground-level visual inspection, then arrange safe access for a closer survey. Record the existing gutter profile, its width and depth, bracket spacing, downpipe diameter, outlet positions and the total length of each run. Take clear photographs of corners, stop ends, hoppers, offsets and any ornamental details before removal begins.

Look beyond obvious holes and corrosion. Persistent overflow may be caused by incorrect falls, a blocked underground drain, too few outlets or a roof area that has been extended since the original system was installed. A sound restoration deals with the complete route of the water, from roof edge to drainage point.

Check where water is causing damage

Water staining beneath joints usually points to failed seals, movement or inadequate support. Damp patches around the eaves can indicate overflowing gutters, but may also result from slipped tiles, defective flashings or a leaking valley. Decayed rafter feet, fascia boards and soffits should be examined before new gutter brackets are fixed.

Pay particular attention to internal corners and valley outlets. These locations receive a concentrated flow during heavy rain and are often the first parts of an older installation to fail. If there is standing water in a gutter after rainfall, the run may need re-setting rather than simply re-sealing.

Match the rainwater profile to the period

A heritage-appropriate profile does not mean accepting the maintenance burden of old cast iron. Cast aluminium guttering can reproduce the substantial appearance and crisp detailing associated with traditional systems while providing a lighter, corrosion-resistant alternative. It is particularly suited to listed buildings, conservation areas and properties where the original elevation matters.

Half-round profiles are common on simpler traditional elevations. Ogee and moulded profiles provide a more decorative line and often suit Victorian and Edwardian buildings. Box gutters may be appropriate where the original detail is concealed behind a parapet or built into a valley, although these need careful capacity and waterproofing design because a blockage can have more serious consequences.

Downpipes and hopper heads should be considered as part of the same elevation. A plain modern plastic downpipe beside an ornate original hopper can look out of place even where the gutter line itself is correct. Aluminium downpipes are available in round and rectangular forms, with swaged ends and offsets to suit traditional arrangements. Decorative hopper heads can retain visual character while providing a practical collection point between gutter and pipe.

When to repair rather than replace

If existing cast iron is structurally sound, local repair can be the right decision, particularly on a listed building. Small cracks, loose joints and isolated corrosion may be repairable after cleaning, preparation and coating. However, repeated patching is rarely good value where long runs have thinned, brackets are failing or leaks occur at multiple joints.

Replacement is often the more dependable route when the system has reached the end of its life or when access costs make repeated repairs uneconomic. The key is to replace like for like in visual scale and profile, not necessarily in material. Any listed building consent or conservation area requirement should be confirmed with the local planning authority before work starts. Requirements vary, especially where original rainwater goods contribute to the significance of the property.

Size the system for the roof, not the old fittings

Original gutters are not automatically the correct size for present conditions. Extensions, roof alterations, changed drainage layouts and more intense downpours can all expose capacity limits. A replacement system should be sized against the effective roof area, roof pitch, gutter run length, outlet positions and local rainfall intensity.

A long rear roof slope draining to one outlet needs more capacity than the same roof divided between two downpipes. Valleys also increase the amount and speed of water entering a gutter. In these cases, increasing the outlet size, adding a downpipe or selecting a deeper profile may be more effective than fitting a wider gutter alone.

This is where a sympathetic restoration and a technically correct installation have to work together. A visible front elevation may require a traditional cast aluminium profile, while a concealed rear elevation can sometimes use a higher-capacity extruded aluminium or pressed aluminium box gutter. The best choice depends on what is visible, how the roof drains and what the existing structure can support.

Do not overlook the drainage below ground. Water discharged from a new, high-capacity system still needs a clear gully, drain or properly designed rainwater soakaway. Testing the outlet during the survey can prevent a new gutter being blamed for a blocked drain.

Gutterdirectonline

Aluminium is a strong fit for period property restoration because it combines low weight with durability and a broad choice of profiles. Unlike untreated cast iron, it will not rust. It is also easier to handle during installation, which can be helpful where access is restricted or work is taking place around retained slates, leadwork and delicate eaves details.

Powder-coated finishes allow gutters, downpipes and hopper heads to be colour matched to existing joinery, window frames, roof details or a heritage colour scheme. Black remains a traditional choice, but dark grey, heritage greens and bespoke colours can be specified where the building calls for it. The finish should be selected early, as it affects every visible component, including brackets, bends and stop ends.

Aluminium systems are available in cast, extruded and pressed forms. Cast aluminium gives the weight and appearance associated with heritage guttering. Extruded aluminium offers accurate, consistent sections and is well suited to many standard runs. Pressed aluminium is often used for box gutters and larger commercial-scale requirements. The right construction is determined by the profile, capacity and visual result required, rather than one being universally better than another.

Installation details that prevent repeat failures

Even a correctly selected gutter will fail if the fixing and falls are wrong. Brackets need secure fixing into sound timber, masonry or suitable fascia support. Replacing rotten timber and then fixing to a stable substrate is preferable to packing out old boards and hoping the line holds.

Set the gutter with a consistent fall towards the outlet. The required fall is modest, but it must be continuous. Excessive fall can look poor on a long, prominent elevation, while too little leaves water standing and increases debris build-up. On long runs, careful setting out before fixing brackets is essential.

Allow for movement at joints and use the manufacturer’s specified connectors, seals and fixings. Mixing components from different systems can create poor fits and inconsistent expansion allowances. Where downpipes pass around stone string courses, bay windows or projecting details, use correctly positioned offsets rather than forcing the pipe out of line.

For larger properties, multi-storey work or difficult access, professional installation offers clear advantages. It reduces the risk of damage to roof coverings and ensures outlets, angles and bracket centres are set correctly. Gutters Direct can supply standard or tailored aluminium rainwater components, arrange cut-and-drop delivery, or support a complete fitting requirement where needed.

Plan maintenance into the restoration

A restored system should not be left until the next leak appears. Clear gutters and valley outlets at least once a year, and more often where trees overhang the roof. Check for debris at hoppers, signs of movement at brackets and discharge from downpipes during heavy rain.

Avoid relying on gutter guards as a universal answer. Some can reduce larger debris but still hold fine material, and poorly fitted guards can restrict flow at an outlet. Their suitability depends on the roof, nearby trees and the ease of safe future access.

A well-chosen aluminium system should preserve the proportions of the property while giving the owner a more manageable, durable rainwater solution. Get the survey, profile and capacity right before ordering, and the finished work will protect the building quietly rather than becoming its next repair project.

How to Measure Gutter Fall for Reliable Drainage

A gutter can look perfectly level from the ground and still fail in heavy rain. Water left standing in the run brings staining, overflowing joints, debris build-up and unnecessary load on the brackets. Knowing how to measure gutter fall before the first fascia bracket is fixed is a straightforward way to avoid those problems. Call our knowledgeable staff at Guttersdirectonline for help.

For domestic and commercial aluminium rainwater systems alike, the principle is simple: the gutter must fall gradually towards the outlet. The practical detail lies in setting the correct high point, calculating the drop over the run and allowing for the gutter profile, outlet position and roof area.

What gutter fall means

Gutter fall is the slight downward gradient along a gutter run that moves rainwater towards a running outlet and downpipe. It is usually expressed as a ratio, such as 1:600, or as a drop in millimetres per metre.

A 1:600 fall means the gutter drops 1mm for every 600mm of horizontal distance. On a 6m run, that equates to a 10mm drop from the highest bracket to the outlet end. It is a shallow slope, but it is enough to encourage drainage without making the gutter line look visibly out of level against the fascia or eaves.

The right fall is not a substitute for correct capacity. A small domestic half-round gutter serving a modest roof has different requirements from a 200mm x 150mm pressed aluminium box gutter serving a commercial elevation. Profile size, roof pitch, catchment area, number of outlets and local exposure all affect the drainage design. Always follow the requirements for the particular gutter system and project specification.

How to measure gutter fall before fitting

Start by deciding where the water will leave the gutter. A single-outlet run falls towards one end. A run with an outlet in the centre falls from each end towards the middle. Long elevations may need several outlets, particularly where a large roof area or valley directs a high volume of water into one section.

Measure the horizontal length of each individual run with a tape measure. Do not use the gutter length alone if the fascia steps around corners or if there are separate sections divided by stop ends and outlets. Record the distance in metres, then multiply it by the selected fall per metre.

For example, if the installation guidance calls for a fall of 2mm per metre and the run is 8m long:

8m x 2mm = 16mm total fall

The bracket at the high end should therefore sit 16mm higher than the bracket at the outlet end. If the run falls to a central outlet, calculate each side separately. A 10m elevation with the outlet exactly in the middle creates two 5m runs. At 2mm per metre, each end is set 10mm higher than the outlet position.

A practical site rule is to keep the calculation visible on the fascia board or in the fitting notes. It prevents small errors being repeated along the length of the run, especially where more than one operative is setting brackets.

Choosing a suitable gradient

Many gutter systems are installed to a very shallow fall, often around 1:600 as a minimum design gradient. In day-to-day setting out, a fall of around 2mm to 3mm per metre is commonly easier to establish accurately and gives positive drainage where the system specification permits it.

More fall is not automatically better. A steep slope can look poor on a short fascia, make one end of the gutter sit awkwardly against the eaves and affect the visual lines of a period property. On heritage work, where cast aluminium profiles and ornamental hopper heads are selected to retain architectural character, the gutter should drain properly without drawing attention to its gradient.

Conversely, setting a gutter too level is a common cause of standing water. Aluminium is corrosion resistant, but water and sediment sitting in any gutter will encourage dirt accumulation and can reduce its effective capacity. The aim is a controlled, consistent fall rather than a dramatic angle.

Setting out the high and low bracket positions

Fit or temporarily mark the running outlet first. This gives a fixed reference point for the low end of a single-fall run. Check that the outlet is positioned to suit the downpipe route, including bends, hopper heads, gullies and any clearance needed around windows, doors or architectural details.

Mark the outlet-side bracket position at the required height. Then measure the calculated total fall upwards at the opposite end of the run and mark the high bracket. Use a laser level, string line or long spirit level to transfer those positions along the fascia.

A laser level is usually the quickest option on long, straight commercial elevations. Set a level datum line, measure down to the outlet bracket position, then measure down progressively less at each bracket position as you move towards the high end. This makes the intended fall easy to check before drilling.

For shorter domestic runs, a taut string line between the two end marks works well. Measure from the string to each bracket mark to confirm a smooth, even descent. Do not rely solely on the fascia board being straight. Older timber fascias, rendered eaves and uneven masonry can vary considerably over a few metres.

Spacing brackets without losing the fall

Once the two end positions are established, divide the run according to the bracket centres specified for the gutter profile. Cast aluminium, extruded aluminium, seamless ogee and pressed box gutter systems can have different fixing arrangements, bracket types and support requirements.

Mark every bracket position before fitting. The drop between individual brackets is calculated by dividing the total fall by the number of spaces between brackets, not the number of brackets themselves. For instance, a 12mm total fall across six equal spaces means each successive bracket is 2mm lower than the previous one.

Extra support is normally required near outlets, angles, stop ends and joints because these areas carry greater weight or experience movement. Position these brackets in line with the system instructions, then adjust the intermediate bracket marks to maintain the same overall gradient. For continuous seamless aluminium guttering, the lack of running joints reduces potential leak points, but the fall and support spacing still need to be set accurately.

Check the roof line, not just the fascia

The gutter should be positioned so water leaves the roof and enters the channel reliably. As a general guide, the front edge of the gutter is set slightly lower than the rear edge, helping excess water overflow away from the building rather than back towards the fascia if a blockage occurs.

Check the relationship between the roof covering and gutter at several points along the run. A roof edge that projects too far into the gutter can restrict flow and hold leaves. If it stops short, fast-moving rain can overshoot the gutter. This is particularly relevant on steep roofs, exposed sites and roofs discharging into valley outlets.

Where the fascia itself is uneven or unsuitable for direct fixing, resolve the fixing background before installing the gutter. Packing out brackets individually to follow a poor line can create a wavy run and make accurate fall difficult to maintain. Sound fascias, correctly placed rafter brackets or a designed support detail provide a better result.

Test the fall before completing the system

Before finalising all bolts, clips and jointing details, pour a controlled amount of water into the high end of the gutter. Watch for pooling, slow sections and water tracking behind the gutter. The test should show a clear movement towards the outlet without water sitting at joints or low spots.

If water stalls in one area, check the bracket line with the laser or string rather than assuming the outlet is blocked. One bracket set a few millimetres too high can create a local dip. Correct it before the system is fully sealed and the access equipment has been removed.

Also test the downpipe route. Water should pass cleanly through the outlet, bends and hopper head where fitted, then discharge to the intended drainage point. A correctly graded gutter cannot compensate for an undersized downpipe, a poorly aligned outlet or a blocked gully.

When standard gutter fall needs more thought

A simple single run on a house extension is usually easy to set out. Larger or more complex schemes deserve a drainage calculation and a planned outlet layout before materials are ordered. This includes wide commercial roofs, parapet and box-gutter applications, internal valley drainage, buildings with long uninterrupted eaves and projects where downpipe locations are restricted.

Snow loading, roof valleys, nearby trees and intense rainfall exposure can all increase the demand on a gutter. In those cases, increasing profile capacity or adding outlets may be more effective than increasing the fall alone. Aluminium systems offer useful flexibility here, from traditional cast profiles for listed buildings to high-capacity extruded and pressed box gutters for contemporary and commercial work.

If the roof area, outlet positions or fascia condition leave any doubt, measure the run and levels before ordering. Gutters Direct can help match the profile, outlet arrangement and fitting approach to the building, whether the requirement is supply only, cut-and-drop or installation support. A few accurate marks at setting-out stage are far easier to make than a correction after the first heavy downpour.

Building Regulations Rainwater Drainage Guide

Building Regulations Rainwater Drainage Guide

A rainwater system can look complete from ground level yet still fail at the first heavy storm. One undersized outlet, a downpipe discharging too close to the wall or a poorly considered soakaway can leave water overflowing onto masonry, paths and entrances. This building regulations rainwater drainage guide explains the practical decisions that sit behind a compliant, durable system for UK homes and commercial buildings.

Start with the drainage route, not the gutter profile

Gutters collect water, but the regulations are concerned with where that water goes and whether it is carried safely away from the building. For projects in England, the principal guidance is Approved Document H, particularly Part H3 on rainwater drainage. Wales has its own approved documents, while Scotland and Northern Ireland operate under separate building standards systems. The principle is consistent: rainwater from roofs and relevant paved areas must be disposed of adequately without causing dampness, flooding or nuisance.

Decide the final discharge point before specifying gutter dimensions, outlets or downpipes. The preferred route will depend on the ground conditions, the site layout, existing drainage and local authority or water company requirements. On many sites, infiltration through a properly designed soakaway is the first option to assess. If this is not practical, discharge to a watercourse may be possible with the necessary permissions. A surface water sewer may be considered where those options cannot be used.

Rainwater should not simply be directed into a foul drain. On older properties, the existing drainage may be combined, and alterations need particular care. A contractor should establish what is already on site rather than assume that a visible gully or manhole provides a suitable connection.

Check whether Building Regulations approval is needed

Replacing like-for-like guttering is commonly straightforward, but a new extension, roof alteration, substantial drainage work or connection to a public sewer can trigger Building Regulations and other approvals. Planning conditions may also require a sustainable drainage approach, especially on larger developments or sites where runoff could affect neighbouring land.

Speak to Building Control early where the drainage route is new or uncertain. This is especially worthwhile on listed buildings, properties in conservation areas and commercial schemes, where heritage appearance, existing services and access constraints often affect the design.

Size gutters and downpipes for the roof they serve

A gutter is not sized solely by its front-to-back measurement. Capacity depends on profile shape, fall, outlet size, number of outlets, downpipe capacity and the effective area of roof draining into it. A long valley, a pitched roof with a large catchment, or a concealed box gutter can send a high volume of water to one point very quickly.

For straightforward domestic work, a competent installer may use recognised sizing tables and manufacturer capacities. For larger roofs, commercial buildings and unusual roof geometry, calculate the rainfall flow using the effective roof area and local design rainfall data. British Standard BS EN 12056-3 is commonly used for roof drainage design. This avoids specifying a visually suitable system that cannot cope at outlet level.

There are several common reasons systems overflow:

  • too few outlets along a long run;
  • downpipes that are too small for the outlet and roof area;
  • back falls that hold water in the gutter;
  • valley discharge positioned close to a gutter stop end; and
  • guards or hopper heads that restrict flow because they have not been matched to the expected volume.

A traditional cast aluminium gutter may be the right visual choice for a period property, but it still needs adequate outlet provision. Conversely, a modern deepflow, ogee or pressed aluminium box gutter can provide useful capacity on contemporary and commercial roofs, provided the supporting fascia, brackets and discharge arrangement are designed accordingly.

Falls, outlets and overflow routes

Gutters need a controlled fall towards outlets. Too little fall can leave standing water and debris; too much can look poor and may reduce the effective depth at the high end. Follow the profile manufacturer’s bracket spacing and fall guidance, rather than relying on a generic rule for every system.

Outlets should be placed where water naturally concentrates. A valley should not dump directly beside a stop end or onto a shallow section of gutter. Where a hidden gutter, parapet outlet or internal rainwater pipe is used, provide a visible warning overflow route where appropriate. A conspicuous overflow is preferable to water tracking unnoticed into a wall, roof build-up or occupied space.

Designing a compliant rainwater drainage route

Once water leaves the downpipe, it needs a route that protects the building and can be maintained. Surface water pipework should be laid with suitable falls, access points and connections for cleaning. Gullies and drainage channels must be selected and detailed for their location, loading and intended connection. A driveway gully, for example, may need a different cover and load rating from one in a planted border.

Avoid allowing discharge to erode soil around foundations, saturate a narrow side passage or run across a public footway. Downpipes should be fixed securely, kept clear of doors and walkways where possible, and arranged so that maintenance can be carried out without dismantling unrelated work.

Where rainwater harvesting is planned, the system must still deal safely with overflow when the tank is full. The tank capacity, filter arrangement, pump use and overflow destination should be part of the drainage design from the outset. A water butt can reduce routine runoff, but it is not a substitute for a compliant overflow arrangement in prolonged rainfall.

Soakaways need ground testing and sensible siting

A soakaway is not just a hole filled with rubble. Its size and suitability depend on infiltration testing, groundwater conditions, soil type, roof area and the likely storm flow. Testing should follow an appropriate recognised method, commonly BRE 365, so the designer can establish whether the ground will accept water at a suitable rate.

Siting matters as much as capacity. A soakaway should normally be positioned at least 5 metres from a building to reduce the risk of water affecting foundations. It must also be placed so that it does not destabilise slopes, overload neighbouring ground or interfere with services. High groundwater, clay soils, contaminated land and restricted urban plots can make infiltration unsuitable or impractical.

Crates, geocellular systems and traditional rubble-filled pits can all have a place, but they are not interchangeable. A crate system offers predictable storage volume when correctly wrapped and installed; a rubble pit can lose void space through silt and is harder to verify. Include accessible silt control upstream where the design calls for it, particularly where roof debris or surface runoff could enter the system.

Product choices that support long-term compliance

Building Regulations set the outcome, not the material. However, material selection affects whether the finished system continues to perform. Aluminium is light, corrosion resistant and available in profiles suited to both heritage and modern work. Cast aluminium gives period properties the depth, texture and ornamental options that plastic systems often cannot match. Extruded and seamless aluminium systems provide clean, continuous runs with fewer joints for contemporary elevations.

For higher flows, pressed aluminium box gutters and larger commercial profiles can be specified with matching outlets, hopper heads and downpipes. Do not reduce the downpipe size simply to suit an existing rainwater pipe location. If a larger outlet is needed, redesign the route or use a suitable hopper and downpipe arrangement.

Powder-coated finishes allow guttering, downpipes, fascias and soffits to be colour coordinated with windows, roofline and cladding. On restoration work, a selected colour can help a new aluminium installation sit comfortably alongside retained architectural details. The finish does not remove the need for good handling: protect coated components during installation and treat cut edges in line with the system guidance.

Fixings also deserve attention. Use brackets at the correct centres, account for thermal movement on long runs and use compatible metals to reduce corrosion risk. Swaged downpipe joints, shoes, offsets and anti-vandal pipe systems should be selected around the building layout, not added as an afterthought. A busy school entrance or public-facing commercial elevation may need a more durable downpipe detail than a sheltered rear wall.

Installation checks before handover

The best time to find a drainage problem is before the scaffold comes down. Check that gutters fall correctly, outlets are fully sealed, stop ends are secure and brackets are fixed into a sound substrate. Run water through each section where practical and inspect every joint, hopper and connection at ground level.

Confirm that the downpipes reach the intended gully, drain or soakaway connection without an improvised open discharge. Make sure access covers remain accessible, guards can be removed for cleaning and any overflow route is visible. Photographing concealed pipework and soakaway construction is useful for future maintenance and can help demonstrate what has been installed.

For supply-only projects, Gutters Direct can help match aluminium gutter profiles, outlets and downpipes to the roof and drainage route. For more involved work, measuring the roof area, outlet positions and existing drainage before ordering will lead to a cleaner specification and fewer site changes.

A rainwater system should be checked after the first significant storm, then cleared regularly of leaves and roof debris. Water should travel from roof to discharge point without spilling over a fascia, staining masonry or collecting beside the building. That simple test is where sound regulation-led design proves its value.

Choosing Aluminium Fascias and Soffits for Rooflines

A roofline can look finished on handover day yet become the next maintenance problem if the fascia, soffit and rainwater system have been selected separately. Aluminium fascias and soffits provide a long-life alternative to timber and uPVC, giving a clean, colour-coordinated edge to the roof while supporting properly planned ventilation and gutter installation.

For a period renovation, that may mean retaining a traditional depth, shadow line and painted appearance without committing the owner to regular repainting. On a contemporary home or commercial project, it may mean long, straight runs in a specified powder-coated finish that match windows, cladding or wall copings. The right answer depends on the roof construction, the gutter loading, the exposure of the site and the detail required at eaves, corners and junctions.

What fascias and soffits do at the roof edge

The fascia is the vertical board or facing fixed along the end of the rafters. It closes the roof edge, provides a neat line for the gutter and, depending on the system, may carry gutter brackets or form part of a purpose-designed eaves detail. The soffit is the horizontal or angled underside between the outer fascia and the wall. It closes the gap beneath the roof overhang and can incorporate ventilation where the roof build-up requires it.

These components should not be treated as decorative trims alone. A poorly detailed roofline can admit birds, insects and wind-driven rain, leave insulation ventilation inadequate, or make gutter replacement unnecessarily difficult. Fascia, soffit, eaves ventilation and rainwater outlets need to work together.

Aluminium is particularly useful where appearance and service life both matter. It is light enough for practical handling and installation, corrosion resistant in normal UK conditions, and available in formed, extruded or pressed sections. Once finished in a suitable powder coat, it offers a consistent surface without the routine painting associated with exposed timber.

Why specify an aluminium roofline?

The immediate benefit is lower ongoing maintenance. Timber fascias can perform well when correctly protected, but their exposed position means paint failure, moisture ingress and localised decay need attention over time. uPVC avoids painting but can be less suitable where an architectural metal finish, a sharper profile or a bespoke colour is required.

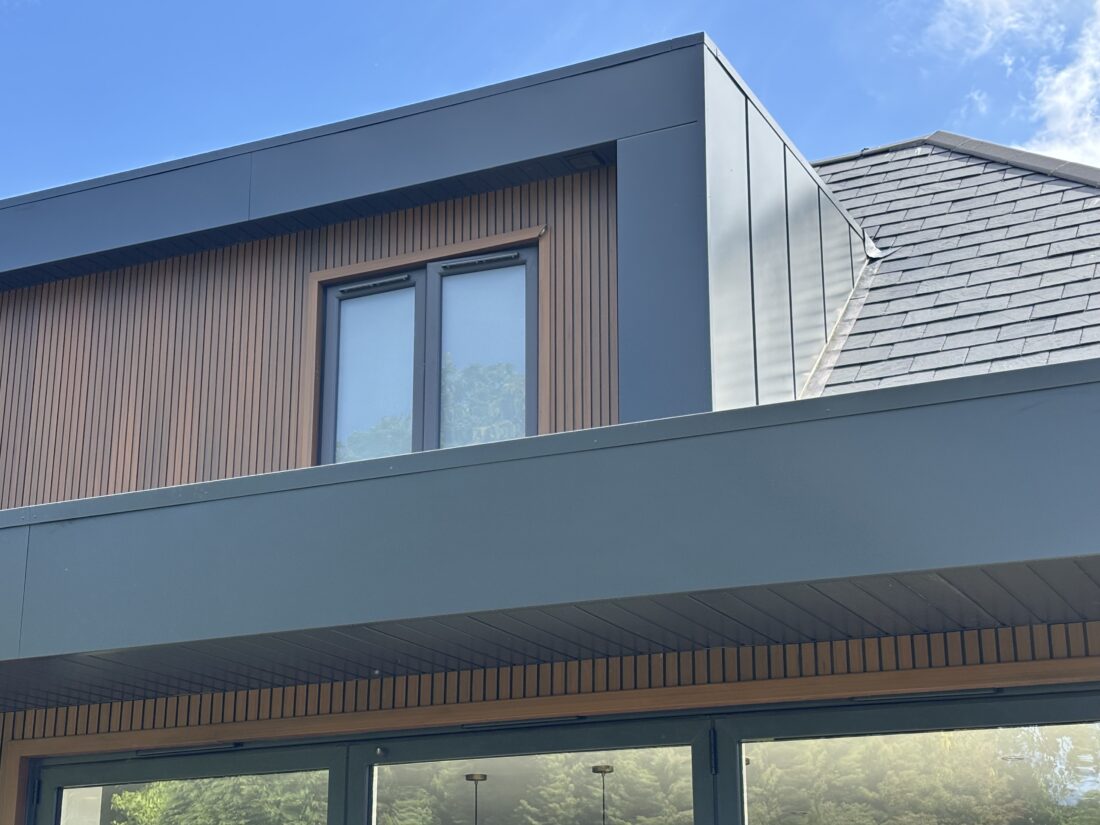
Aluminium fascias and soffits are well suited to projects where the roofline must sit comfortably alongside aluminium gutters and downpipes. Using compatible materials and matching finishes gives the elevation a more considered result than fitting a separate white plastic roofline beneath a heritage cast gutter or a modern box-gutter scheme.

There are practical advantages for larger work too. Aluminium sections can be produced in useful lengths, reducing the number of joints across wide elevations. Bespoke powder coating allows a selected RAL colour or other specified finish to be carried through fascias, soffits, gutters, downpipes and hopper heads. Dark grey, black and anthracite shades remain common on contemporary projects, while heritage greens, blacks and muted tones can suit traditional buildings.

That does not mean aluminium is automatically the correct choice in every case. Initial material and fabrication costs can be higher than basic uPVC. The finished system also relies on accurate setting out and secure fixing. An aluminium face will not compensate for uneven rafter ends, decayed backing timber or an incorrectly formed eaves detail.

Choosing the right fascia profile

Profile selection starts with the roof design rather than colour. A shallow domestic eaves detail may only need a straightforward fascia facing and soffit lining. A deeper overhang, a concealed gutter arrangement or a commercial roof edge may call for folded sections designed around the roof build-up.

Extruded aluminium is often chosen where a consistent, clean-edged profile is needed. Pressed aluminium is useful for folded, project-specific shapes, including wider fascias, cover flashings and interfaces around box gutters. The most appropriate thickness, return folds and fixing arrangement should be set against the span, support centres and exposure. Long unsupported lengths can show movement or oil canning if the section is too light for the application.

Gutter position is equally important. Where brackets fix through the fascia, the fixing substrate and load path must be confirmed. A gutter full of water, ice or accumulated debris imposes far more load than an empty section. Large roof areas, valleys and commercial elevations may need high-capacity aluminium box gutters, larger outlets and downpipes, plus a fascia arrangement designed to support the system safely.

For listed buildings and traditional properties, visual proportion matters. An overly deep, sharp-edged fascia can alter the character of a cornice or eaves line. In these cases, measure existing details carefully and consider how the new roofline will meet retained mouldings, brickwork and decorative gutter profiles.

Ventilation is a roof requirement, not an afterthought

Soffits are often the simplest place to introduce eaves ventilation, but the ventilation requirement must come from the roof design. A cold roof, warm roof, loft conversion or insulated rafter construction can each need a different approach. Ventilated aluminium soffit panels or discreet continuous vents can provide airflow while maintaining a tidy underside.

The key is continuity. Blocking air paths with insulation, fitting perforated panels where no internal route exists, or adding vents without insect protection will not resolve a condensation risk. The installer should understand how air enters at the eaves and where it can pass through the roof void or ventilation zone.

Finish, colour and coastal exposure

Powder coating is a major reason aluminium roofline products are specified. It gives a durable coloured finish and makes it possible to coordinate the full external drainage package. However, colour choice is not only aesthetic. Very dark finishes can become hotter in direct sun, so allowance for thermal movement is sensible on long lengths. Expansion gaps, slotted fixings or purpose-made joints should follow the system detail rather than being improvised on site.

Coastal, industrial and heavily shaded locations deserve extra attention. Salt-laden air, pollutants and persistent damp can shorten the life of any external finish if surfaces are neglected. Specify an appropriate coating system for the environment, prevent contact with incompatible metals where possible, and ensure cut edges, fixings and junctions are properly detailed.

A roofline should also be accessible enough for sensible inspection. Aluminium does not rot, but gutters still need clearing, outlets still need checking and sealant joints still have a service life. Low maintenance is not no maintenance.

Installation details that affect the finished result

Good installation begins with a sound, straight substrate. Before fitting aluminium fascias, check rafter ends, tilting fillets, backing boards and any existing timber for movement or deterioration. Correcting the line before metalwork is installed is quicker and neater than trying to pull a finished fascia straight with fixings.

Use compatible fixings suited to the substrate and environment. Fixing centres, joint treatment and support requirements should follow the selected profile and manufacturer guidance. Avoid mixing metals carelessly, particularly where trapped moisture could create a corrosion risk. Junctions at corners, verges, abutments and downpipe positions should be planned before sections are cut.

Soffit sections need enough support to remain flat and should be detailed so that water cannot track behind them. Where the roofline connects to guttering, make sure gutter brackets, stop ends, outlets and downpipe offsets remain accessible. A visually neat fascia is of little value if a failed outlet requires dismantling the surrounding installation.

For supply-only work, accurate site dimensions and photographs of the eaves detail help identify the right sections and accessories before ordering. Cut-and-drop services can reduce site cutting and wasted material, particularly on multi-elevation projects. For more complex domestic, heritage or commercial work, professional fitting support can remove uncertainty around set-out, ventilation and rainwater interfaces.

When a complete aluminium system makes sense

Replacing fascias and soffits is often the right time to review the gutters and downpipes. Existing gutter capacity may be inadequate for an extension, a steeper roof, altered roof coverings or changing rainfall expectations. Matching the roofline to a correctly sized aluminium gutter system avoids repeating access work later.

A complete approach is especially worthwhile where a property needs continuous colour coordination, where old cast-iron drainage is being replaced, or where large roof areas feed into box gutters and multiple outlets. Gutters Direct can supply aluminium fascias and soffits alongside gutters, downpipes, hopper heads and associated roofline components, with standard supply, cut-to-size delivery and installation options available according to the project.

Before placing an order, confirm the roof edge dimensions, ventilation requirement, gutter profile, outlet positions, downpipe route, colour reference and fixing background. Those details turn aluminium fascias and soffits from a finishing item into a roofline that looks right, drains correctly and remains straightforward to maintain for years to come.

Pressed Aluminium Wall Copings for Lasting Protection

A parapet wall can look sound from ground level while water is steadily working into its upper courses. Pressed aluminium wall copings provide a neat, hard-wearing cap over exposed masonry, directing rain clear of wall faces and reducing the risk of staining, frost damage and failed render. For new builds, refurbishments and commercial roof work, they offer a clean architectural finish without the weight or maintenance demands of many traditional coping materials.

What pressed aluminium wall copings do

A wall coping sits on top of a parapet, boundary wall or flat-roof upstand. Its job is simple: cover the vulnerable top of the wall and shed water away from both sides. The detail matters because water that runs down the face of masonry can penetrate joints, saturate render and leave unsightly streaks below.

Pressed aluminium copings are formed from aluminium sheet to suit the required wall width, return depth and fixing arrangement. They are usually supplied in manageable lengths with joint pieces, corners and stop ends as required. Folded drip edges help water break away from the coping rather than tracking back underneath it.

The result is particularly useful where a project needs a consistent finish across roofline and rainwater goods. Aluminium downpipes, gutters, fascias and copings can be specified in complementary powder-coated colours, avoiding the mismatched appearance that often develops when several materials are used on the same elevation.

Why aluminium suits exposed wall tops

Wall copings spend their working life in the most exposed part of the building envelope. They deal with standing rain, wind-driven water, ultraviolet light, frost and repeated temperature changes. Aluminium is naturally corrosion resistant, light enough to handle efficiently and suitable for durable powder-coated finishes.

Its low weight is a practical advantage on site. Long coping sections can often be moved and positioned with less strain than concrete or stone alternatives, while placing less load on the supporting wall. This can be valuable on refurbishment schemes where the existing parapet has limited capacity or where access is restricted.

Aluminium also gives specifiers freedom over appearance. A crisp folded profile suits contemporary brickwork, rendered elevations and commercial premises, while a carefully chosen colour can soften the look on more traditional properties. Black, anthracite grey and white remain common choices, but bespoke powder coating allows the coping to match windows, soffits, cladding or existing rainwater systems.

There are trade-offs. Aluminium copings do not replicate the depth, texture or hand-finished character of natural stone, so they may not be the right choice for a highly sensitive heritage elevation. On listed buildings, the proposed material and profile should be checked against planning and conservation requirements before work starts. Where visual authenticity is essential, stone or cast alternatives may be required.

Choosing the right pressed aluminium wall copings

The correct coping is not selected by wall width alone. It needs to cover the wall fully, provide appropriate overhang and include returns that protect the top edges of the masonry. The profile must also work with the wall construction, roof waterproofing detail and any insulation build-up within a parapet.

Measure the finished wall, not the drawing

Take measurements from the completed or intended finished wall face, including render, brick slips, coping support boards or cappings that form part of the build-up. A coping based on the structural wall width can be too narrow once finishes are applied.

The overhang should be sufficient to move water away from the wall face, and the drip detail must sit clear of it. If the drip is too close to the masonry, rain can bridge the gap and run back onto the wall. A supplier can advise on suitable formed returns where site dimensions are known.

Plan joints and changes of direction early

Straight runs are only part of the order. External corners, internal corners, stop ends, expansion details and abutments all need to be considered before fabrication or cutting. A neat coping installation is usually decided at survey stage, not when the installer reaches the end of the wall with a spare length.

Aluminium expands and contracts with temperature changes. Long continuous runs therefore require sensible joint spacing and an installation method that allows movement without opening gaps or distorting the coping. This is especially relevant on wide, sun-exposed parapets and dark-coloured finishes, which can become significantly warmer in direct sunlight.

Specify the finish for the site conditions

Powder coating provides the visible finish and contributes to the long-term appearance of the installation. For most domestic and standard commercial applications, a quality exterior-grade finish in the selected RAL colour gives a durable, low-maintenance result.

Coastal locations, industrial environments and exposed roof levels deserve closer attention. Salt-laden air, airborne contaminants and frequent cleaning regimes can place greater demands on the finish and fixings. It is worth discussing the site location and expected exposure before confirming the specification rather than treating colour as the only decision.

Installation details that protect the wall

Pressed aluminium wall copings should be fixed to a sound, level substrate. Any loose masonry, failed render or uneven wall top needs attention first. Trying to pull a coping straight over an irregular surface can create poor joints, visible rippling and areas where water is able to collect.

Fixings should suit both the substrate and the coping system. Stainless steel fixings are often used to reduce the risk of corrosion, while concealed fixing methods can provide a cleaner finished appearance where the profile allows. Avoid mixing incompatible metals without suitable separation, as this can contribute to galvanic corrosion in persistently wet conditions.

Sealants are useful at designated laps, end details and interfaces, but they are not a substitute for correct falls, drips and mechanically secure joints. A coping should shed water by its shape first. Relying on a continuous bead of sealant to keep water out usually creates a maintenance issue later.

At roof level, the relationship between the coping and waterproofing membrane must be clear. The roof covering should terminate and weather correctly beneath the coping arrangement, with no exposed edge left dependent on sealant alone. On new-build projects, this is best coordinated between the roofing contractor, bricklayer or cladding installer and the coping supplier before materials arrive on site.

Where pressed aluminium is particularly effective

Pressed copings work well on flat-roof extensions, blocks of flats, schools, retail units and office premises, where long parapet runs benefit from a consistent, lightweight system. They are also a practical option for garden boundary walls, entrance features and modern housing developments where colour coordination is part of the design brief.

For larger commercial schemes, repeatable sections and clear setting-out can help maintain programme control. Supply-only orders may suit experienced contractors with established fitting teams, while cut-and-drop services can reduce site cutting and waste. Installation support is useful where a project includes complex corners, variable wall widths or interfaces with new roof drainage.

Gutters Direct can help customers match aluminium wall copings with compatible gutters, downpipes, fascias and soffits, whether the requirement is a straightforward residential parapet or a wider roofline package.

Maintenance and inspection

One of aluminium’s main benefits is that it does not need routine painting in the way timber or mild steel details often do. It should still be inspected periodically, particularly after severe weather or building works near the parapet.

Check that joints remain aligned, fixings are secure and drips are clear of accumulated debris. Wash away dirt using clean water and a mild detergent where needed, avoiding abrasive pads or aggressive cleaning chemicals that could damage the powder-coated surface. If roof work, scaffold ties or access equipment have marked the coating, deal with local damage promptly to preserve the appearance of the system.

The best coping detail is one that fits the wall, the roof and the wider elevation from the start. Provide accurate dimensions, confirm the finished wall build-up and choose a finish suited to the exposure. That small amount of planning gives the installer a clearer job and gives the building a properly protected top edge for years to come.

Anti Vandal Aluminium Downpipes for UK Sites

A downpipe at ground level is exposed to more than rainwater. On schools, public buildings, retail units, housing blocks and busy access routes, it can be struck by bins, bicycles and vehicles, or deliberately pulled away from the wall. Anti-vandal aluminium downpipes are specified where the rainwater system needs to stay secure, presentable and serviceable under tougher site conditions.

Aluminium is well suited to this role. It offers a long service life, does not rust like unprotected steel and is considerably lighter to handle than cast iron. When paired with the right brackets, fixings and outlet arrangement, an anti-vandal system can protect the lower section of a drainage run without compromising the appearance of the building.

What makes a downpipe anti-vandal?

The term anti-vandal does not mean a downpipe is impossible to damage. It describes a system designed to make impact, removal and tampering more difficult than with a standard domestic installation. The result depends on the complete lower-pipe detail, not simply the material of the downpipe.

A typical specification uses a more substantial aluminium pipe section, closely spaced or security-minded fixing points, and a secure connection between the pipe and the outlet below. Brackets should be selected to suit the wall construction and installed with fixings appropriate to the substrate. A sound fixing into masonry is very different from a fixing into a lightweight cladding panel or insulated render system.

The vulnerable area is usually the first 1.5 to 2 metres above ground level. This is where a downpipe can be kicked, hit or used as a handhold. Some projects use an anti-vandal lower section joined to a conventional aluminium downpipe above. Others continue the heavier-duty arrangement for the full height, particularly on schools, transport buildings and exposed commercial elevations.

Why aluminium is a practical choice

For many refurbishments, aluminium gives the visual quality of a premium rainwater system without the weight associated with cast iron. It is easier to transport around site, simpler to lift into position and available in profiles that suit both traditional and contemporary elevations.

Its corrosion resistance is a key advantage in the UK climate. A correctly finished aluminium downpipe will not develop red rust, and powder-coated finishes can be selected to coordinate with windows, fascias, cladding or existing rainwater goods. Black remains popular for heritage-style schemes, but anthracite grey, white and project-specific RAL colours are frequently specified on modern work.

There is a trade-off. Aluminium resists weathering very well, but a thin or poorly supported pipe can still be dented by a hard impact. This is why anti-vandal performance should be addressed through profile selection, wall brackets, jointing and ground-level detailing rather than relying on the metal alone.

Choose the profile around water capacity

Security is only one part of the brief. The pipe still has to move the volume of water collected by the gutter. A downpipe that is undersized can cause water to back up at the outlet in heavy rainfall, leading to overflowing gutters and staining below the eaves.

Round, rectangular and square aluminium downpipes are available for different architectural styles and drainage demands. A period property may need a traditional round pipe with a cast-effect hopper, while a contemporary block of flats may call for crisp rectangular lines. Larger roofs, box gutters and commercial gutter systems often require higher-capacity outlets and downpipes.

The right size depends on roof area, gutter profile, outlet positions, rainfall exposure and the route to drainage. On a long run, adding outlets can be more effective than expecting one downpipe to deal with the entire roof area. For a commercial project, this calculation should sit within the wider rainwater design rather than being decided by appearance alone.

Specifying anti-vandal aluminium downpipes correctly

A clear specification prevents the common problem of ordering a quality pipe but leaving the installer to improvise the most exposed details. Establish whether the pipe runs directly to a gully, discharges into a shoe, connects to below-ground drainage or terminates above a drainage channel. Each arrangement affects how the lower end is secured.

The following points should be agreed before ordering:

  • the downpipe profile, diameter or face dimensions, and required water capacity;
  • the height of the anti-vandal section and whether it is continuous or localised at ground level;
  • the wall construction, insulation depth and fixing method for brackets;
  • the outlet, shoe or drainage connection at the base of the pipe; and
  • the required powder-coated colour, finish and any planning or conservation requirements.

Where pipes are fitted to rendered insulation, rainscreen cladding or a façade with a cavity, bracket fixing needs particular care. Fasteners must reach a suitable structural backing or use an approved support system. Fixing only to the outer finish can lead to movement, cracked render and eventual failure, regardless of the quality of the aluminium pipe.

Brackets and joints matter as much as the pipe

The bracket arrangement should stop the downpipe twisting, rattling or being levered away from the elevation. Brackets are normally positioned at regular intervals, with additional support around offsets, branches and changes in direction. The exact spacing should follow the system guidance and the site conditions. A pipe next to a service yard or school playground may justify closer support than one on a protected private elevation.

Swaged aluminium components can provide neat, direct connections where one section fits into another. Depending on the selected system, joints may use socketed sections, unions or purpose-made connectors. The fitting method must allow water to travel down the pipe without escaping at a joint, while also keeping the assembly securely aligned.

Avoid mixing incompatible materials or components without checking the detail. A mismatched outlet, improvised bracket or poorly sealed adaptor can create leaks and weak points. It can also undermine the finished appearance of an otherwise well-specified system.

Where anti-vandal protection is most useful

Not every home needs an anti-vandal detail on every downpipe. On a detached house with gated side access, standard aluminium downpipes and correctly spaced brackets may be entirely suitable. The case is stronger where there is public access, regular deliveries, shared circulation space or a history of damage.

Schools and leisure facilities are obvious examples, particularly around playground-facing elevations. Retail and commercial premises benefit where pipes run beside loading areas, entrances or bin stores. Housing associations and facilities teams may specify them on communal blocks to reduce repeat repairs. They are also a sensible consideration for exposed pipework on community buildings, car parks and public realm projects.

For listed buildings, the visual requirement can be just as demanding as the security requirement. A traditional-style cast aluminium hopper head and round downpipe can retain the intended character, while the ground-level fixing detail is upgraded to suit the site. This avoids treating heritage appearance and practical durability as competing priorities.

Installation checks that prevent call-backs

Before fitting, check that outlets line up with the intended pipe route and that the wall is sufficiently even for the brackets. Set the downpipe plumb, but do not force sections into alignment if the outlet has been installed out of position. Correcting the route early is preferable to putting joints and brackets under constant strain.

Keep joints clean during assembly, use compatible fixings and check that water discharges positively into the chosen drainage point. Protective film, swarf and site debris should be removed before handover. On powder-coated aluminium, take care when cutting or handling components so the visible finish is not marked.

For supply-only orders, dimensions, finish and component compatibility should be confirmed before materials arrive on site. Gutters Direct can provide aluminium downpipe components, colour-finished systems and technical guidance for standard or project-specific requirements, with cut-and-drop and installation options where needed.

A well-planned lower-pipe detail costs far less than repeated repairs to a damaged elevation. If a downpipe is likely to be struck, climbed or tampered with, specify the protection at the design stage and make the brackets, joints and drainage connection part of the same decision.

Square Aluminium Downpipe System for UK Buildings

A square aluminium downpipe system gives a building a deliberately clean, architectural finish while carrying roof water safely away from the gutter line. It suits contemporary homes particularly well, but its neat geometry can also work on extensions, converted properties, schools, offices and light-commercial projects where a round pipe would look out of place. The key is to specify the pipe size, outlet arrangement and fixing method around the roof area and expected water flow, rather than choosing on appearance alone.

Why choose a square aluminium downpipe system?

Square downpipes create straight vertical lines that complement box gutters, modern ogee gutters and flat-roof drainage details. They are often selected where fascias, cladding, window reveals or architectural features already follow a crisp rectangular pattern. The result is a rainwater installation that looks considered rather than added as an afterthought.

Aluminium brings practical benefits alongside that appearance. It is considerably lighter than cast iron, corrosion-resistant and suitable for powder coating in a wide range of RAL colours. That makes it possible to match downpipes to gutters, window frames, soffits, cladding or the wider colour scheme. A factory-applied finish also avoids the regular repainting associated with many older rainwater materials, provided the system is cleaned and maintained properly.

For contractors, the lower weight is useful on site. Lengths are easier to handle, transport and fix, while aluminium fittings provide a durable alternative where a project calls for a premium, long-life rainwater solution. For property owners, the benefit is straightforward: a well-specified system manages water effectively without compromising the building’s exterior.

Start with drainage capacity, not just profile

The correct downpipe is determined by the amount of water the gutter must discharge. Roof area, roof pitch, valley positions, local exposure and gutter profile all affect the volume reaching an outlet during heavy rainfall. A large roof served by a high-capacity box gutter may need larger square downpipes, additional outlets or both. A modest porch or single-storey extension will have very different requirements.

This is why downpipe selection should be considered with the complete rainwater system. The gutter outlet, offset bends, pipe length, shoe and drainage connection all need to work together. Restricting a large gutter outlet into an undersized pipe can create a bottleneck just when the system is under pressure. Water may then back up at the outlet, spill over the gutter front or run down walls.

As a rule, a square profile should be chosen because it offers the required capacity and fits the design, not because it simply appears substantial. On commercial schemes, it is sensible to assess each elevation separately. One roof slope may collect significantly more water than another because of a valley, parapet arrangement or adjoining roof level.

Outlet positions matter

A downpipe can only remove water that reaches its outlet. Long runs of gutter need adequate fall and suitably positioned outlets, especially where there are internal corners or valleys. An outlet near the centre of a long gutter run may require falls running in two directions, while an outlet at one end requires the gutter to be set with a consistent fall towards it.

Where drainage is being replaced on an existing building, check whether the underground gullies and drains can accept the revised layout. Moving a downpipe for a cleaner façade may introduce additional bends or leave a discharge point without a suitable connection below. The visible pipework and the drainage below ground should be planned as one system.

Square downpipes and compatible aluminium gutters

A square aluminium downpipe system is commonly paired with pressed aluminium box gutters or other contemporary aluminium profiles. Box gutters and square pipes share a simple visual language, making them a natural option for modern new builds, blocks of flats, commercial entrances and extensions with sharp-edged roof details.

That does not mean square pipes are restricted to box gutter projects. They can be used with selected extruded and ogee aluminium gutters where the property design supports the combination. The connection between the gutter outlet and pipe is the important part. Use purpose-made outlets and matching bends rather than attempting to adapt incompatible components on site.

For period properties, a round or traditional cast aluminium downpipe may be the better architectural choice, particularly where listed-building details or ornate hopper heads are involved. There is no single profile that suits every property. A square pipe offers a strong contemporary finish, while traditional elevations may call for a more sympathetic heritage profile.

Specify the components before ordering

A complete installation normally includes more than straight pipe lengths. The exact arrangement depends on the eaves position, wall construction and drainage point, but it will often require an outlet, bends or offsets, pipe clips, a shoe and possibly a hopper head or access component. Missing one small item can delay a fitting programme, particularly when work is arranged around scaffolding or other trades.

Measure the wall height and identify every change in direction. An offset is often needed to bring the pipe from the gutter outlet back to the wall face. Check the projection of the eaves, fascia depth, insulation build-up and any cladding before selecting bends. It is better to establish the offset accurately than to force pipework into line during installation.

Pipe clips should suit both the downpipe profile and the substrate. Masonry walls, timber-framed elevations, external insulation systems and cladding façades can each require different fixings or support strategies. Fixings must reach a sound structure, not only a decorative finish. On exposed elevations or busy public areas, anti-vandal fixings may also be worth considering.

Allow for cutting, joints and movement

Aluminium systems are usually supplied in manageable standard lengths and cut to suit on site or through a cut-and-drop service. A clean, square cut makes a real difference to the fit and appearance of joints. Remove sharp edges after cutting and follow the manufacturer’s guidance for jointing, sealing and fixing centres.

Like other metals, aluminium moves with temperature changes. This is more relevant on long gutter runs, but pipes should still be fitted with the specified clips and joint details rather than over-restrained. Do not substitute random sealants or drill unnecessary holes through visible faces. Purpose-designed components give a cleaner result and help maintain the finish.

Finish options for a coordinated exterior

Powder-coated aluminium allows square downpipes to become part of the building design rather than a default black or white utility item. Black, anthracite grey and dark bronze remain popular for contemporary projects, while lighter greys, whites and bespoke RAL shades can coordinate with render, windows and metal cladding.

A dark finish can make pipework visually recess against dark brick or cladding. On a pale rendered wall, a colour-matched pipe may be less intrusive, while a contrasting colour can be used deliberately to define a façade. Consider the finish alongside the gutter, hopper, fascias, soffits and any external metalwork before placing an order.

The coating should be protected during storage and installation. Keep lengths supported, avoid dragging them across abrasive surfaces and remove swarf after drilling or cutting. Small installation marks may be more noticeable on lighter or satin finishes, so careful handling is part of achieving the intended appearance.

Fitting for reliable long-term performance

Downpipes need to be plumb, securely clipped and positioned so they discharge into a suitable gully, drain connection or approved surface-water arrangement. The lower shoe should direct water without splashing against the wall or undermining paving. Where a pipe terminates close to pedestrian routes, consider the risk of impact and the practical need for protection.

Maintenance is limited but not optional. Clear leaves and moss from gutters, outlets and hopper heads so water can enter the pipe freely. Inspect joints, clips and shoes periodically, particularly after storms or building works. A blocked outlet can make even a correctly sized square pipe appear inadequate.

For supply-only orders, detailed measurements and a simple elevation sketch help confirm the required components. For more involved work, Gutters Direct can support a tailored supply, cut-and-drop or installation arrangement, helping keep the gutter and downpipe specification aligned from the start.

A square aluminium downpipe is most effective when it is treated as a working part of the drainage design, not merely a finishing detail. Match the profile to the architecture, size it for the roof and use compatible aluminium components throughout. That approach gives the building the clean lines it needs and the rainwater capacity it will rely on when the weather turns.