

Top Rainwater Outlets for Flat Roofs
A flat roof may look level from ground level, but its drainage design cannot be. Selecting top rainwater outlets for flat roofs is about more than choosing a visible grate: the outlet, roof falls, waterproofing detail, pipework and overflow route must work as one system. Get one part wrong and standing water, leaks at penetrations and overloaded downpipes soon follow.
For domestic extensions, blocks of flats, schools and commercial roofs alike, the best arrangement depends on roof area, catchment shape, drainage route and the capacity of the receiving rainwater system. A well-specified outlet moves water off the roof quickly while allowing the roof covering to remain secure and maintainable.
What is a top rainwater outlet?
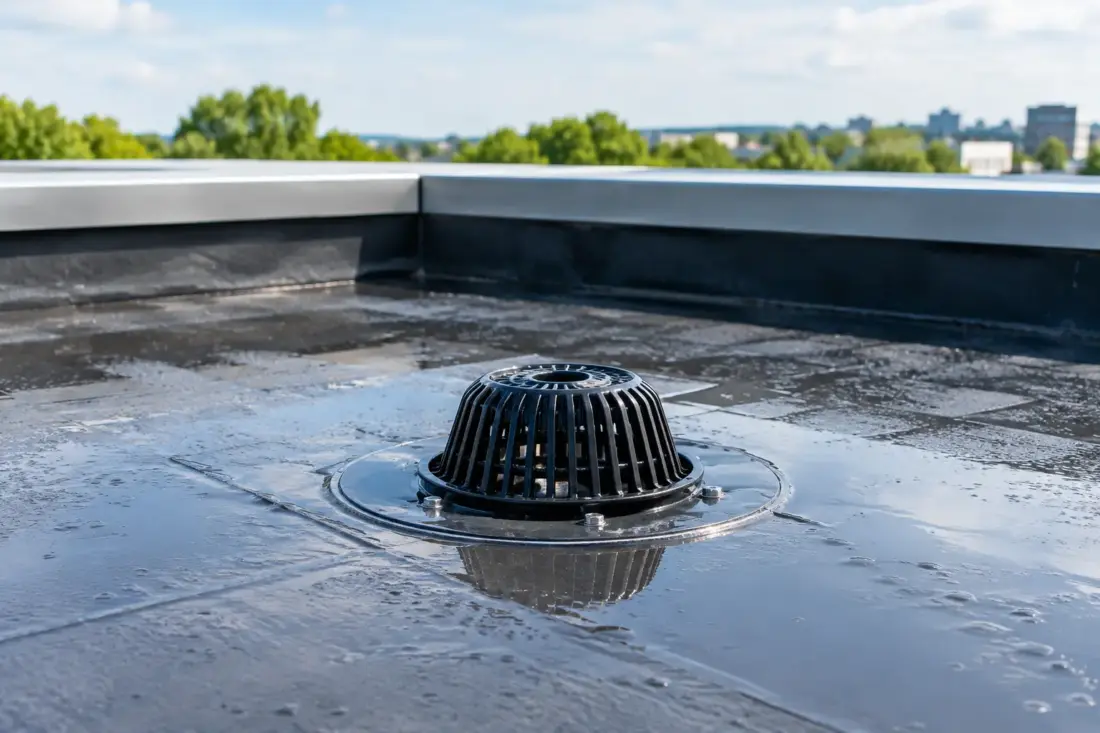
A top outlet is positioned at the roof surface, with water entering vertically through a leaf guard or dome grate and passing into pipework below. It is commonly used where internal drainage is practical, such as on larger flat roofs, roofs behind parapet walls, or projects where external pipes need to be kept out of sight.
This differs from a side outlet, also called a scupper or horizontal outlet, which takes water through a parapet or edge upstand before discharging into an external hopper, gutter or downpipe. Neither is automatically better. Top outlets give a direct drainage route through the roof structure, while side outlets can be easier to inspect and connect to external aluminium rainwater goods.
The key question is not simply where the water leaves the roof. It is whether the whole route can handle the calculated flow, remain accessible for maintenance and provide a safe response if the primary outlet blocks.
Start with roof falls, not the outlet catalogue
An outlet cannot drain water that never reaches it. Flat roofs should be formed with designed falls directing water to the low points, rather than relying on the roof deck appearing broadly level. Tapered insulation schemes are often used to create these falls without major structural changes, particularly on refurbishment projects.
A centrally located top outlet can work efficiently where falls are arranged from all sides towards it. On a long roof, several outlets may be preferable to one large outlet at an end. This reduces the distance water has to travel, limits ponding risk and avoids concentrating too much flow into a single downpipe.
Valleys deserve particular attention. If roof falls meet at a valley, the outlet needs to sit at the true low point, not slightly uphill of it. Small setting-out errors are enough to leave persistent water around the outlet, which adds load to the roof and accelerates dirt build-up.
Sizing top rainwater outlets for flat roofs
Outlet capacity is governed by more than the diameter of its spigot. Roof area, rainfall intensity, the number of outlets, pipe layout, gutter or hopper capacity and local site exposure all affect the design. A roof in a highly exposed location or an area prone to intense rainfall needs more careful allowance than a sheltered small extension.
Drainage should be calculated to the relevant UK guidance, including BS EN 12056-3, with the roof build-up and discharge arrangement considered as a complete system. Do not assume that a large outlet makes a small pipe adequate. A restriction anywhere downstream can cause water to back up at the roof.
For straightforward domestic work, a competent roofer or drainage designer can assess the catchment and select suitable outlets and downpipes. On larger commercial, education or multi-unit schemes, formal calculations are sensible. They help prevent costly late changes when the proposed rainwater pipework cannot accommodate the design flow.
Where an outlet connects to external rainwater goods, the downpipe and gutter profile must match the expected volume. Pressed aluminium box gutters and high-capacity downpipes are often suited to modern commercial elevations, while cast aluminium systems may be the right visual choice where a period property needs a traditional finish. Appearance matters, but capacity comes first.
Positioning and spacing outlets correctly
Outlets should be located at drainage low points and set clear of obstructions such as rooflights, plant plinths, doors and maintenance walkways. A rooflight uphill of an outlet can interrupt the water path and create a pocket where debris collects. Likewise, placing an outlet tight to a parapet can make membrane detailing and future cleaning more difficult.
On roofs with parapets, it is good practice to consider how water behaves during a blockage. If the only outlet becomes obstructed, the roof should not be allowed to fill until water reaches door thresholds, cladding interfaces or structural limits. Secondary drainage provides a controlled escape route.
Outlet spacing is therefore a balance. More outlets provide resilience and shorten flow paths, but they also add penetrations, pipework and installation detail. On a small roof, one correctly sized primary outlet plus a visible overflow may be suitable. A large roof will usually need multiple drainage points, often arranged in zones so that no one outlet carries an excessive catchment.
Do not treat overflows as optional
A secondary overflow is one of the most valuable parts of a flat-roof drainage layout. It is not designed to replace primary drainage during normal weather. Its job is to make a blocked or overwhelmed primary system obvious and to release water before it causes damage.
Overflow scuppers through a parapet are a common solution. They should be set above the primary drainage level but below any vulnerable threshold or roof build-up level. The discharge point needs careful thought too. Water spilling from an overflow must not create a hazard at an entrance, saturate a façade or discharge onto a lower roof without adequate drainage.
An internal emergency overflow may be appropriate on certain commercial roofs, but it requires coordinated pipework and clear maintenance responsibility. Visible external overflow routes are often easier to identify when there is a problem, particularly on occupied buildings.
Match the outlet to the roof covering
The outlet flange and waterproofing interface must suit the roof system. Single-ply membranes, liquid-applied systems, asphalt, felt and green roof constructions all have different detailing requirements. The roofer should use the outlet manufacturer’s compatible clamp ring, membrane flange or bonding method rather than improvising a joint on site.
A properly formed detail provides a watertight connection while allowing water to enter without catching on a raised edge. The insulation and vapour-control layer also need to be detailed around the penetration to avoid cold bridging or concealed condensation risks.
For inverted roofs and green roofs, protection against blockage becomes even more important. Filter layers, inspection chambers and accessible leaf guards may be needed so the outlet remains clear of growing medium, loose chippings and wind-blown debris. A standard dome grate alone may not be sufficient.
Connecting outlets to aluminium rainwater systems
A top outlet may discharge to internal pipework, but many projects need a transition to external rainwater goods at a lower level. This is where coordinated dimensions matter. The outlet spigot, rainwater pipe, hopper and downpipe should be selected as a compatible route, with sufficient capacity at every point.
Aluminium is particularly useful for visible external elements because it is lightweight, corrosion resistant and available in a wide choice of powder-coated colours. It can be specified to blend with window frames, copings, fascias and cladding, or to provide a more traditional painted-metal appearance on heritage work.
Where a roof drains to an external box gutter, allow for the box gutter’s width, depth and outlet arrangement rather than focusing only on the downpipe. A high-capacity pressed aluminium box gutter can manage substantial flows, but its brackets, stop ends, joints and overflow provision must be designed accordingly. Long runs also need proper support and allowance for movement.
Installation and maintenance points that prevent failures
Most outlet problems are caused by poor detailing or neglected maintenance rather than a defective outlet body. Before the roof is handed over, check that falls lead cleanly to each outlet, leaf guards are fitted, waterproofing is fully dressed and clamp rings are tightened to the roof system requirements. The pipework should be tested before finishes conceal it.
Maintenance should be planned around the building and its surroundings. Roofs below trees may need checks several times a year, particularly after autumn leaf fall. Clear debris from grates, inspect overflows, check for damaged guards and look for ponding that suggests a settlement or blocked outlet. Facilities teams should also know where outlets discharge and which overflow indicates a fault.
For a new build, refurbishment or commercial re-roof, Gutters Direct Online can help coordinate the visible aluminium gutter, hopper and downpipe elements with the required roof drainage capacity and finish. The most effective solution is the one that suits the roof geometry, handles local rainfall and can be safely maintained long after the scaffolding has come down.